
So now that Old Lady Winter has finally accepted defeat- although she did not give up her reign without a fight. It is now time for spring to pull out her most fashionable clothing and show us what she’s working with, and you best believe she is struttin’ her stuff and giving us full bloom. It’s that kind of weather that makes you wanna call up your girls, make a couple cocktails- or maybe some freshly squeezed lemonade (wink)- and chill out on the porch. If you do decide to “live life on the edge” (lol) I’ve got a quick and easy DIY that will make even your lemonade glass feel delighted.
These color blocked rope coasters scream “spring fashion & the great outdoors”, and are a must try.

Here are the supplies you’ll need:

Now Let's begin.

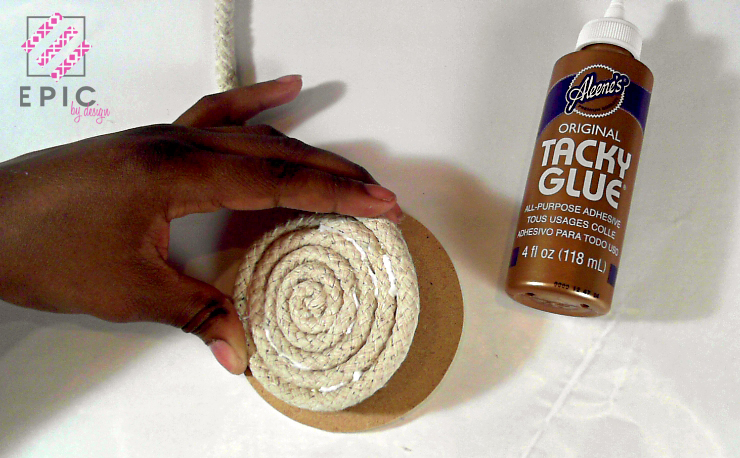
So to start you will need your rope, your round template, and some Aileene's Tacky Glue. The round template will be used as a guide for sizing and as a flat surface to coil the rope on. If you hold it in your hands to coil it, it will not lay flat once you're finished. Be sure to keep this in mind.

Next you will need to apply some Tacky Glue about a half inch away from the top of the rope.

Now coil the top part of the rope tightly and press it firmly against the glue. (You will need to hold it for a few seconds to make sure that it does not come undone... To speed up the process I ran my heat tool (blow dryer will work too) on it to make it dry a little faster).

Continue tightly and firmly coiling the rope. Add Tacky Glue every half inch. Do not worry if the glue presses to the top, it will dry clear and plus you will be painting over it so it will not be visible.
Once you get to the end of your rope (pun intended...lol) be sure to apply some Tacky Glue to the end of it so that it will not unravel.
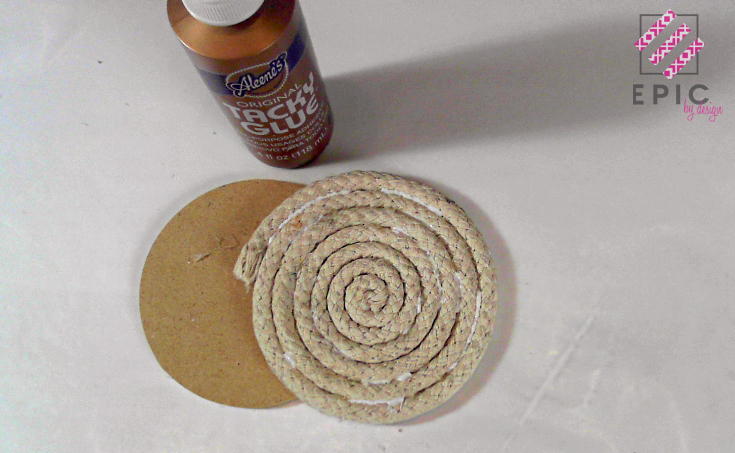
Wait for it to completely dry and then snip off a small piece of the end so that its straight

Now glue the end piece down and wait for it to dry completely before moving on to the next step.
This is what it should look like (as you can see the glue is still a little wet in this photo)

Now that your coaster is dry it's time to apply some color. I want my base to be white so I am applying some Tulip Fabric Spray.
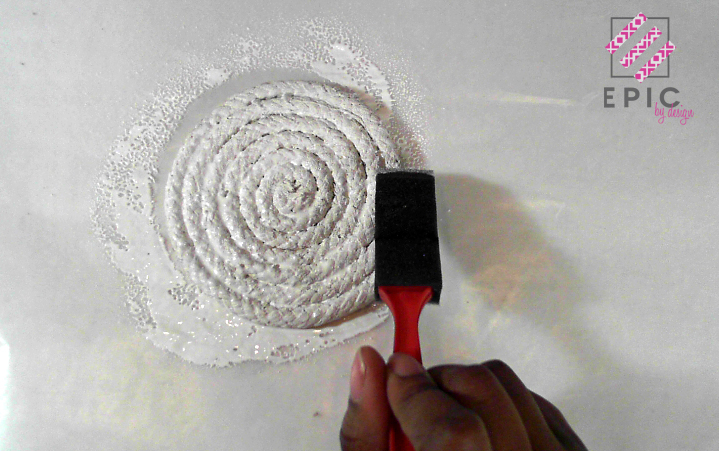
Be sure to get into the groove (literally..lol) I found that using a sponge brush was easiest to get the paint in to the grooves of the rope.

Once its completely dry, this is what it should look like.

Now its color blocking time! Add some masking tape in your desired pattern. This will help you get clean crisp lines. You can get creative with the patterns. I chose to keep it simple. I am using Americana Mulit-Surface Paints in Neon Yellow and Neon Pink
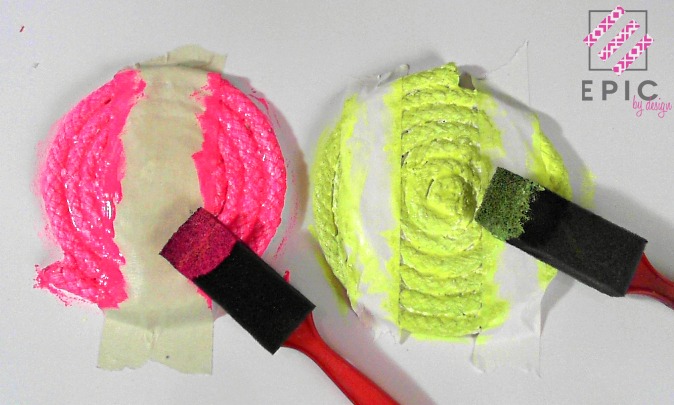
Once you have applied your color wait for it to dry completely before removing the masking tape.

This is how it should look once you've removed the tape.

Now you have a fun and colorful coaster set that will coincide greatly with all of your outdoor gatherings. I do hope you give these a try. If you do be sure to share your projects with me on my Facebook page, and hashtag #MadameRoTV.
For all you DIYers who are more visual learners I have a video tutorial for you all to watch. Happy viewing!
If you enjoyed this video tutorial and are interested in seeing future tutorials be sure to hit that subscribe button. Also check out past tutorials via my "Tutorials" tab.
Thank you for joining me today.
Muah!

Thank you for joining me today.
Muah!
Cool, I like the way the coasters turned out
ReplyDeleteThank you so much Marcia :)
ReplyDelete